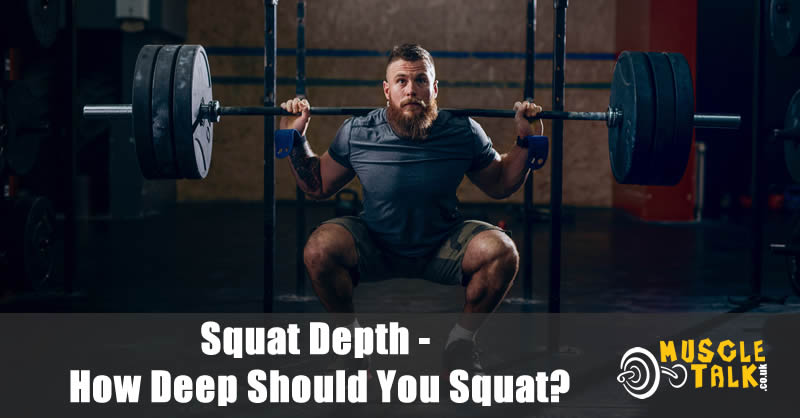
Squat like it matters… because it does!
You see athletes from all modalities doing it – not just lifters. Yes, it’s true that even skiers, swimmers, and football players all have integrated squat training into their sport-specific programming. As a compound movement, squats offer you the chance to work on a number of different muscles all at once.
While many athletes think of a squat as a foundational movement, the truth is that it’s actually a complex motion that requires real mobility to perform well. From a biomechanical standpoint, squatting involves both joint and muscle systems and requires them to work in sync to move correctly and reduce the risk of injury.
If you’ve ever seen a person walk into the gym, stroll up to the squat rack and begin squatting immediately, you might have wondered if that’s an effective and efficient use of time. The answer is no. Because squatting is such a compound movement, it requires significant time to prime the body in preparation for what you’re asking it to do. Not including the right kind of warmup into your programming puts you at serious risk of injury.
The most important thing to remember when performing a squat is this:
Make sure your knees, hips, and ankles flex well enough to be able to reach your desired depth while maintaining a neutral spine. That means you have to spend time before you get under the bar, warming up these joints.
Equally important is the way you squat is directly related to the shape and movement of your spine and the anatomy of your hips. Read on to find out how to improve your squat and understand your own mobility as well as your individual anatomy.
Contents
An Overview of the Spine
Everyone’s anatomy is different, so the amount that your knees, hips, and ankles need to flex to maintain a neutral spine will be different than someone.
Understanding how to achieve a neutral spine is critical for proper squat depth. First, let’s talk about your spine.
Though you might not give it a lot of thought, your spine is literally the most robust and durable part of your body. It allows you to do every single movement that you perform every single day – flexion, extension, and rotation. The spine also has the ability to “lock down” during movements that involve both the upper and lower limbs – like running, jumping, or lifting heavy.
Movement and force transfer are both important things a healthy spine should be able to handle. This becomes even more important when adding a barbell and a weight load.
So, a neutral spine allows your spine to have its normal curvature while standing. It has alternating sections of different types of curves. These are called lordotic and kyphotic, and these curves form an S shape. This allows load distribution of weight to be even between your intervertebral discs and helps balance out the compressive force.
When your spine is out of its neutral position, say when you’re trying to squat, the compressive force pushes unevenly on your disks. This creates a big problem for the flexion discs in your spine since the spine can’t support compressive force when flexed.
Your spine has an anterior ligament that helps your discs from bulging forward. So, discs are able to stand up to extension, but end up pushing backward – in turn, stressing and stretching the rear part of your spine.
The result is doubly problematic.
First, as humans, we outlive our discs. Discs in your spine are responsible for shock absorption between vertebrae. As we age, these discs become brittle, and if you’re performing loaded movements incorrectly, you’re taxing your discs to the point of injury.
Secondly, once a disc is injured, it won’t heal itself. It might be repaired with surgery, but there’s no guarantee for success.
The only viable solution is to learn to squat to depth that allows your spine to maintain its natural neutral curvature.
A quality squat requires the appropriate amount of flexion in the knees, hips, and ankles along with a spine that doesn’t change in curvature while moving. This means that there should be a mild extension of the spine from the start to the completion of the movement. The only way to improve your spine is to address your mobility issues and focus on drills to help build the correct muscle patterns.
In order to get as low as you can whilst maintaining neutral, you need to consider how the mobility of your primary and secondary joints affect your flexibility. Improper form on a squat provides you many clues about your overall stability, mobility, and motor control.
Now that you understand what you’re asking of your spine during a loaded barbell movement let’s talk a little about your hips.
Basic Anatomy of the Hip
Have you ever seen someone in the gym who has impressive flexibility and mobility right out of the gate? This person might not spend any time warming up, and yet they can get below parallel with ease. Or maybe they’re able to perform pistol squats or other squat variations without breaking a sweat. The truth is that they might have anatomy on their side.
There are six main anatomic variations that might be contributing factors to squat depth challenges. Most often, when athletes say they have difficulty squatting, or that their feet turn out, or they have an overly wide stance, everyone wants to blame a mobility issue on the hips.
The hip joint is made of a ball at the top of your thigh bone and a socket on your pelvis. Around the femoral head and acetabulum (hip socket), there are lots of muscles, connective tissues, and a joint capsule.
On one side of your hip, you have your pelvis. The pelvis is made of three bones that form the hip socket. Your femur fits snuggly into the hip socket and is covered by connective tissue and then muscle.
The head and the neck of the femur are important to consider when evaluating your squat. Not all humans have the same femur shape, and as a result, they sit differently inside the hip socket. That means that everyone is going to squat just a little differently.
Generally, the deeper your hip socket, the less range of motion your femur has to work with. The same is true if your hip socket is shallow – you’ll have more range of motion.
Some athletes will have differently shaped femurs – either twisted forward or backward. This directly impacts the alignment of the femur in the hip joint. A more aligned femur is called an anteverted hip. A flattened angle is a retroverted hip.
Why is this important?
If you have an anteverted hip, your anatomy dictates that you have a lot of internal rotation of your hip and not a lot of external rotation. You might have heard this condition called “pigeon toe” or “knock-kneed”. If the internal rotation of your hip causes this alignment, then your tibia most often adapts by forming an outward twist.
Of course, not much of this is visible on the surface, and unless your gym offers advanced imaging, there’s no exact way for you to know. Forcing your body into alignment to satisfy the “ideal” squat technique only puts you at risk for injury. If you know that your mobility is on point and you’re still having issues getting comfortable in a squat, it might benefit you to look into imaging to uncover what’s going on with your anatomy.
Ankle Flexibility
Regardless of the anatomy of your hip, there is something to be said for excellent ankle flexibility, though it’s an often overlooked joint during many warmups. Dorsiflexion is the movement that decreases the angle between the top of your foot and the shin.
Plantarflexion is the movement that increases the angle. Plantarflexion usually isn’t an issue for most people, but having a lack of dorsiflexion is very common, especially if you wear shoes a lot. And since most people do wear shoes often, that means your heels are raised, which reduces your capacity for dorsiflexion. If your ankle is stiff because of this, then your knees overcompensate and then eventually travel up the rest of your joints – resulting in tight hips and poor form.
People with tight ankles can’t break parallel without shifting the weight to their toes and raising their heels. This achieves a below-parallel squat, but it comes at a price – namely overly stressing your knee. Ideally, you should be able to squat to your own parallel without lifting your heels off the ground.
No matter how much your hips might be genetically engineered for a deep squat, having adequate dorsiflexion will help you avoid unneeded stress on your knees. You might be tempted to wear a pair of powerlifting shoes to compensation for your lack of ankle mobility, but over time that will only compound your problem. The reason is because a lack of mobility means your posterior chain isn’t properly engaged.
Let’s review. You have limited ankle mobility, so you squat with most of your weight resting on your toes. That means your movement is primarily all quads, with very little glute and hamstring activation.
If your goal is monster quads for a bodybuilding competition, this might be perfect for you. But for athletes interested in strength, overall muscular balance, and functional fitness, this is really bad. Remember that the only way you can produce the most power safely is to push off your heel and engage your hamstrings and glutes.
Ankle flexibility is one of the biggest factors in being able to perform a squat correctly. If your heels tend to lift off the ground as you’re approaching the bottom of a squat, or if you shift weight onto your toes, then your ankles are super tight. Loosening them up during your warm-up can help you drop into a neutral spine below parallels squat more easily.
Comparing Parallel and Below-Parallel Squats
When athletes squat to excess depth, it’s often because they’ve fallen victim to believing that they should. All movements have a maximal range of motion and an optimal range of motion. However, the two are rarely one and the same.
Deep squats are rarely optimal unless you happen to be a world-class level Olympic lifter or a consistent powerlifter competitor. Deep squats lead to joint issues, constant soreness and tightness, and an altered walking gait.
Squatting to parallel is a more practical approach to squats because it helps you find your natural stopping point, which is your neutral spine.
To find your stopping point, you need to make sure all of your muscles are very engaged. The tighter you are, and the more you activate, the less you’ll collapse. When you squat to parallel, your body will require a lot more muscle activation and neural recruitment compared to a deep squat where you might bottom out.
Accommodating resistance is using bands and chains as part of your squat training. It helps reinforce your own personal squat depth since it activates your nervous system and increases activation and tightness. If you try to deep squat using accommodating resistance, you’re going to lose your neural recruitment and tightness.
Eccentric isometrics help you learn how to maintain proper stability, posture, tightness, spinal alignment, and body mechanics. This means that you’re very slow on the negative of the squat. Pausing for a few seconds in the stretched parallel position will help you learn to feel your way through the movement. Invariably, it helps cue your spine where to stop.
Pausing midway through a rep is also an essential training approach to check and reset the tightness in your body. Remember that squatting is a full-body compound movement; there’s no time at which it should feel like your body isn’t engaged. A mid-way pause will help retrain your body to eliminate that excessive downward momentum that’s so often seen in deep squats.
Check Yourself Before You Wreck Yourself
You might be feeling like having to relearn how to squat is going to take a long time. The truth is that with a few simple tests, you can isolate how your body mechanics aren’t failing your form, and then it’s simple to make adjustments.
First, check out how much internal rotation your hips have. To do this, lie on your back and move your foot away from your body. Then, determine your external rotation by moving your foot away from the body. This helps you assess any possible mobility restrictions you might be dealing with and will help you form an ideal plan on how to best address them for your body.
If there’s a significant difference between the internal versus external rotation on the same leg, then you might have an issue with your hip joint. Instead of rushing out for computer imaging, try Craig’s Test first.
Craig’s Test helps determine the anteversion of your femur. Remember that anteversion causes internal rotation of the femur. If you try to force your hip into a position where the head of the femur isn’t seated properly inside the hip socket, you’re putting yourself at serious risk.
Lower extremity malalignment directly impacts the load distribution on your joints. It also affects the mechanical efficiency of your muscles. If you’re trying to force your hip into a position that it can’t go to based on anatomy, you’re directly altering your function and control of your lower half of your body. Anteversion is also directly related to hip and knee joint injury.
This happens because increased femoral anteversion increases hip adduction and knee abduction forces the kneecap to shift to the middle instead of shifting out. Have you ever heard a coach cue you to track your knees out? This is what they’re trying to prevent from happening. Craig’s Test will help determine if you have more internal or external rotation of your hips. If you test “normal,” then your leg will be pointing only slightly away from your body. If there’s a large angle, then you might have an anteverted hip.
What this means for training is that you’re going to need to address your foot angle and your squat stance. Hip anteversion might mean you need to squat with a narrower stance and your toes straighter. The long and short is that if it hurts when you perform the movement, this is a cue from your body that you need to move differently.
You need to be able to feel stable in your stance and shouldn’t have pain. Merely conforming to the “ideal” squat position for the sake of mastery is going to get you anywhere. Some of us are born with anatomy that makes deep below-parallel squatting simple and easy. Some people aren’t both that way. But that doesn’t mean that your anatomy should be a hindrance to chasing big lifts. Instead, you simply need to adjust your approach and find what works right for your body.
How to Improve
The name of the game here is constant care and attention to your joints. There are tons of different warmups that you can incorporate into your lifting programme. Stretching will help increase the range of motion of your muscles by decreasing the stiffness of the tissues around it. Static stretching is one of the most common approaches to priming your body for a lift, though there are many other methods that you might find useful as well.
Make sure that your warmup addresses all of your joints, but don’t forget the role that your spine plays. If your thoracic spine isn’t very flexible, you might have challenges adequately distributing weight at the bottom of a squat.
In addition to stretching, core activation should be an integral part of your warmup. Pallof presses and single-leg raising/lowering exercises can help engage your core before you load your barbell. Just as you need core activation, if your glutes aren’t awake and ready to lift, your form is going to suffer. X-band walks, foam rolling, and bridge movements can all help.
Some science shows that too much time spent working on mobility before squatting can actually hinder your performance. That’s because overdoing it over time can lead to desensitizing muscle spindles, which results in an overly excessive range of motion.
Muscular tension during the eccentric part of a squat is directly related to your depth. Most often, it peaks at parallel; anything beyond it and your activation gradually decreases. The deeper you go beyond your version of parallel, the greater your muscles relax. Cue yourself to stop at the point just before you feel your muscles begin to go slack.
Keep your feet fairly straight. Excessive toe flare increases the chance that you’re going to collapse in the bottom of a squat because your hip flexion is decreased, and your ability to hinge is minimal.
One of the most important things you can do is sit back. This means that the majority of your weight should be in your heels while still keeping your toes in contact with the floor. This optimises weight distribution and allows for your joints to naturally stack.
A strong neutral stance is one that feels stable and powerful. Going too wide or too narrow means you’re going to ask your hips to do work that they aren’t designed for anatomically. Plus, you’ll increase your chances of bottoming out.
Remember that it’s generally better to stop a bit higher than a bit lower. Focus on stability and mechanics, and inevitably, more mobility will follow.
Conclusion
Remember that there’s no one-size-fits-all position for a squat. Every athlete is different, and everyone will approach depth and width differently. The old adage that squatting to depth is essential for quad development just isn’t true. While it’s critical for success in powerlifting meets, squatting below parallel is a sure-fire way to injury.
Maintaining proper spinal alignment is so very important. This helps you create a solid foundation for body mechanics – the tighter your spine, the less likely you’ll collapse. Focus on keeping your spine tall and elongated instead of becoming compressed and rounded. If you squat to a depth where your spine begins to look like a tortoise, then you’re squatting too deeply.
Unless you understand your own body mechanics, have a strong core, and can keep your spine neutral below parallel, then it’s best you work first on mobility and then continue to add weight. Yes, it’s true that the deeper you go, the more effective the squat. But if you’re unable to do it correctly, your efforts are probably best focused on mastering a parallel squat and them working from there. In fact, if you’re just trying to build a powerful lower body, you might not even need to below-parallel squat.
The golden key to a proper squat depth is mobility – and that’s not just your hips. Your ankles and wrists need to be open and available to absorb some of the load from the weight. You need to be able to maintain a neutral spine at the bottom of your squat – whatever that looks like for you. If your secondary joints aren’t mobile enough, then your body will compensate, resulting in unnecessary injuries. Practice is key here. The more you incorporate comprehensive multi-joint warm-ups into your lifts, the better your joints will feel.